How to Calibrate Your RC Transmitter?
Hey there! If you just picked up your first RC transmitter and feel a bit lost, you have come to the right place. Calibrating your RC transmitter makes sure every stick move and switch flip sends the exact signal your model needs. You get smooth control, no sudden jerks, and way more fun on the field or track.
Many beginners skip this part and end up with a plane that flips or a car that pulls to one side. But you will not make that mistake. This guide walks you through everything in plain steps. You learn why each part matters and how to fix little issues fast. Grab your transmitter, some fresh batteries, and let us dive right in. By the end, your RC setup will feel like an extension of your hands.
Why Calibrating Your RC Transmitter Matters So Much
You control your RC plane, car, drone, or boat with radio signals. The transmitter turns your stick pushes into numbers the receiver understands. If those numbers sit off center or stretch too far, your servos act weird. One servo might hit its limit early while another lags behind.
Think about it like tuning a guitar before you play. A bad tune sounds off no matter how hard you try. The same goes for your RC gear. Proper calibration gives you full stick travel, crisp center points, and safe limits so nothing binds or breaks. You also cut down on battery drain and wear on the motors.
New hobbyists often ask why their model drifts or twitches. Nine times out of ten, the transmitter needs a quick calibration. Once you nail it, you feel confident to try faster speeds or tighter turns. Plus, you save money on repairs because parts last longer. Ready to make your RC transmitter work perfectly every time? Let us start with the basics you need to know.
Get Familiar with Your RC Transmitter Parts
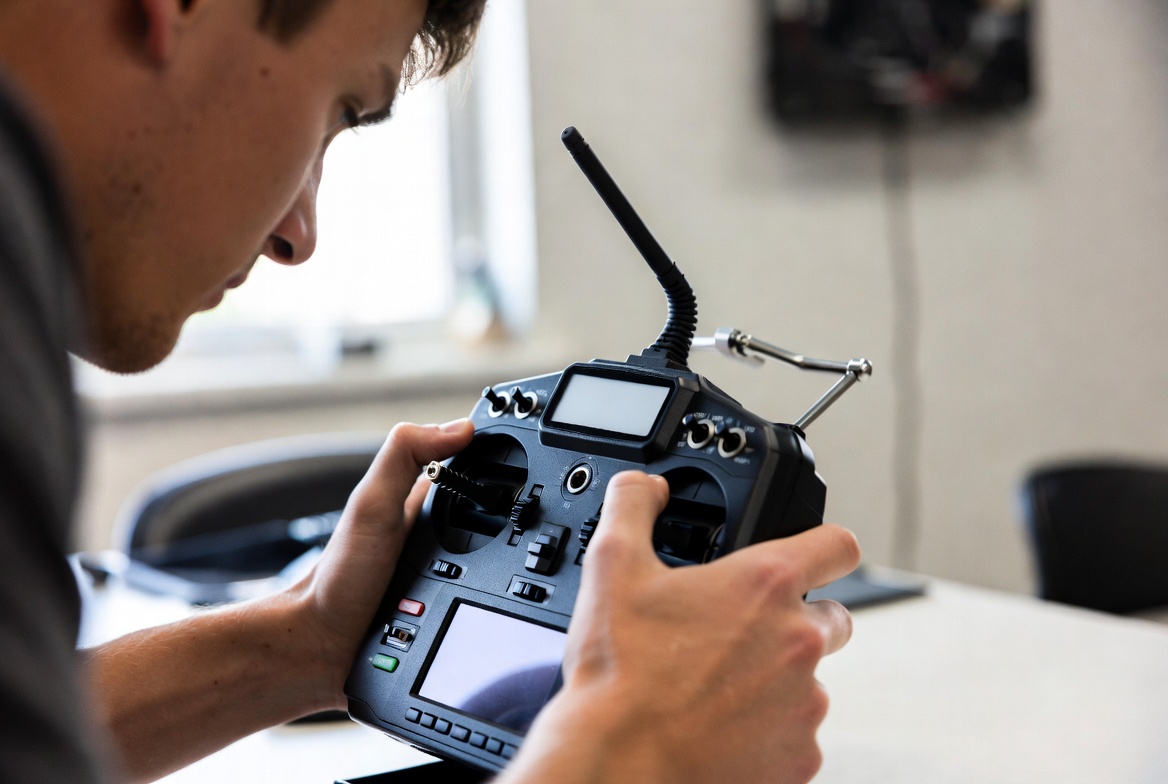
Before you touch any buttons, take a minute to look at your transmitter. Most models have two main sticks. The right stick usually handles elevator and aileron on planes or steering and throttle on cars. The left stick covers rudder and throttle. You will also spot switches, knobs, and a screen or lights that show settings.
The gimbals sit under those sticks. They send signals when you move them. Trims are the tiny sliders next to the sticks that nudge the center point. End point adjustment, often called EPA, sets how far each channel can go. Sub-trim fine-tunes the exact middle. You might see dual rate switches that let you shrink stick travel for smooth flying when you need it.
Receivers plug into your model and talk back to the transmitter. They need a clear link, called binding, before anything works. Different brands like Flysky, Spektrum, or FrSky have slightly different menus, but the ideas stay the same. You will use the same core steps no matter which one sits in your hands.
Take your transmitter outside or to a clear table. Turn it on without the model connected yet. Play with the sticks gently and watch the screen. You see numbers jump from zero to one hundred on each channel. Those numbers tell the story of your calibration. Now you know what to watch for as you go.
Tools and Items You Need for the Job
You do not need a fancy workshop for this. A few simple things make the process smooth and safe. Grab your RC transmitter and its receiver. Fresh batteries or a charged battery pack keep power steady so you avoid false readings.
You also need your RC model close by. For a plane, prop the wings on stands so the control surfaces move freely. For a car, lift the wheels off the ground with a block. A small screwdriver helps if you adjust any mechanical linkages later.
Bring a notebook or your phone to jot down numbers you see on the screen. Some transmitters let you save settings, but writing them down gives you a backup. A helper comes in handy for drone or boat setups so one person holds the model while the other works the sticks.
Clear space around you matters too. Keep metal objects away because they mess with the radio signal. Turn off nearby Wi-Fi routers or phones if you notice glitches. With these basics ready, you stay focused and finish fast.
Step One: Power Up and Check Everything Safely
Start simple. Slide fresh batteries into your transmitter and turn it on. The screen lights up and beeps. Let it sit for a few seconds so the internal circuits settle. This quick warm-up prevents weird readings later.
Next, plug the receiver into your model. For electric setups, connect the battery but leave the motor unplugged or the propeller off. Safety first. You do not want anything spinning while you test controls. On nitro or gas models, keep the fuel line disconnected until you finish.
Hold the transmitter at a normal distance, about ten feet away. Move each stick slowly through its full range. Watch the receiver lights flash or the model servos twitch. If nothing happens yet, do not worry. You have not bound the system. This step just confirms power flows everywhere without surprises.
You should hear soft clicks from the servos as they move. If a servo makes a grinding noise, stop and check the linkage. Loose pushrods or tight hinges cause that sound. Fix it now so calibration goes clean later. Once everything powers up quietly, you move to the next big part.
Step Two: Bind the Transmitter to the Receiver
Binding locks your transmitter and receiver together like best friends. Without it, signals never reach the model. Most transmitters have a bind button or menu option. Check your manual for the exact button, but the idea stays easy.
Turn off both the transmitter and receiver. Press and hold the bind button on the receiver while you turn its power on. The receiver light starts flashing fast. Now turn on your transmitter while you hold its bind button or select the bind mode from the menu. The flashing stops and the light turns solid. You hear a confirmation beep. Success!
Test the link right away. Move the sticks gently. Your model’s control surfaces should follow. If they do not, turn everything off and try binding again. Sometimes distance or interference blocks the first try. Keep the transmitter close, about three feet, during binding.
Once bound, you have a solid radio link. This step opens the door for real calibration. You now control the model directly, so every tweak you make shows up instantly. Great job getting here. The fun part starts now.
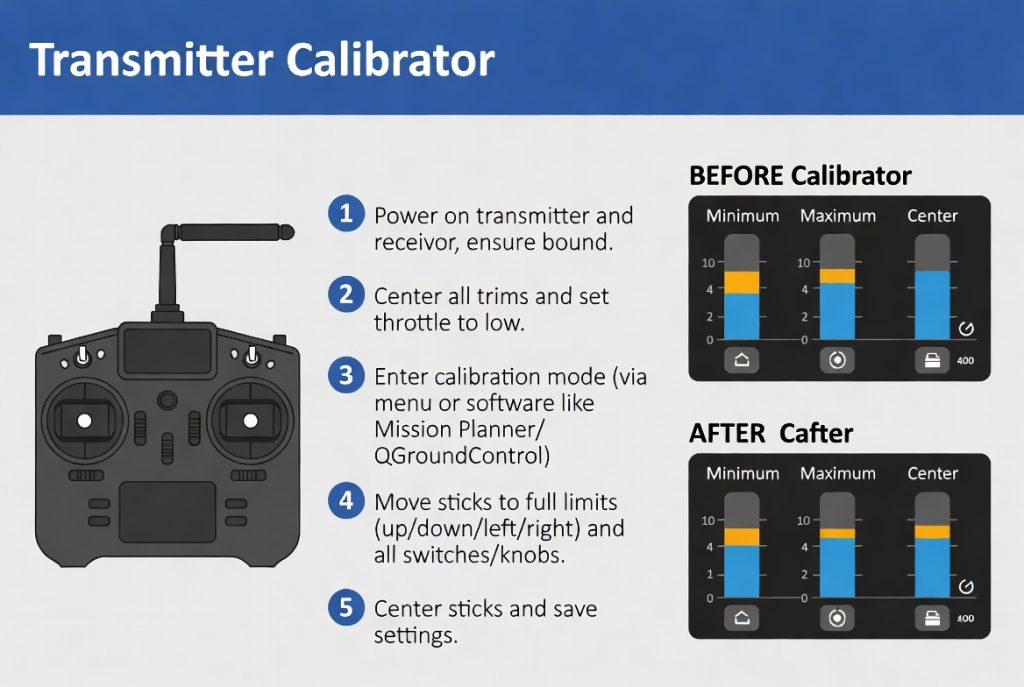
Step Three: Center the Sticks and Set Basic Trims
With the link live, set all sticks and switches to their middle positions. Look at the transmitter screen. Each channel should read close to 50% or 0 on some systems. If a number sits way off, use the trim sliders to bring it back to center.
Trims act like tiny adjustments that tell the receiver where neutral lives. Push the trim button up or down until the servo stops moving when you let go of the stick. Do this for every channel: throttle, steering or aileron, elevator, rudder, and any extra channels for flaps or lights.
Why center first? Because all later settings build on this neutral point. A bad center makes your model pull left or climb constantly. You fix that frustration in one quick pass. Take your time here. Move each stick a tiny bit and watch the numbers settle.
After you center everything, cycle the sticks through their full travel a few times. This wakes up the gimbals and clears any dust or old grease. Your transmitter now knows exactly where zero sits. You feel the difference already.
Step Four: Calibrate Full Stick Travel and Endpoints
Now you teach the transmitter how far the sticks can go. This step sets the endpoints so servos reach their safe limits without straining. Most menus have an EPA or travel adjust screen.
Select the first channel, usually throttle. Push the stick all the way forward and note the number on the screen. It should hit 100% or close. Pull it all the way back and check the low end, usually -100% or 0%. If the number stops short, increase the EPA percentage until the stick hits its mechanical limit and the screen shows full range.
Repeat for steering or aileron. Move the stick left and right until the numbers match the max travel. Do the same for elevator and rudder. For extra channels like flaps or gears, flip the switches and set their endpoints too.
Watch your model while you do this. The control surfaces should move smoothly to their max without hitting the frame or binding. If a servo buzzes at the end of travel, lower that endpoint a few percent. This keeps everything safe and quiet.
You now have full, even travel on every stick. Your RC transmitter responds exactly the way you expect. No more dead spots or sudden jumps. This step alone makes flying or driving feel natural.
Step Five: Fine-Tune with Sub-Trims
Sub-trims give you tiny tweaks beyond the main trims. Sometimes linkages sit a hair off center after you set EPA. Sub-trim nudges the servo arm without touching the stick position.
Go back to the menu and find sub-trim for each channel. With the stick at center, adjust the number up or down until the control surface lines up perfectly straight or neutral. For a plane, the elevator should sit flat. For a car, the wheels point straight ahead.
Only change sub-trim in small steps, like one or two points at a time. Big jumps throw off your endpoints. After each tweak, move the stick full range and back to center to check everything still lines up.
This step feels like magic. You watch a crooked servo arm straighten out with one button press. Your model sits perfectly still when you let go of the sticks. No more holding constant pressure to keep it straight.
Step Six: Set Up Dual Rates and Expo for Better Control
Dual rates let you shrink or grow stick travel with a flip of a switch. Beginners love low rates for smooth starts. High rates give full power when you feel ready. Find the dual rate menu and set a low percentage, maybe 60%, for your first switch position.
Expo softens the center of the stick so small moves feel gentle while big moves stay strong. A little expo, like 20%, makes precise hovering or cornering much easier. Too much expo feels mushy, so start low and test.
Apply these to the main flight controls first. You can set different rates for aileron and elevator if your model needs it. Test on the ground or in a safe hover. Flip the switch and feel how the model reacts. Tweak until it matches your style.
You now fly or drive with confidence at any speed. Dual rates and expo turn a twitchy setup into a buttery smooth one. Beginners swear by this feature once they try it.
Step Seven: Test the Whole Setup and Fine-Tune Live
Time to see everything work together. Power up the model in a safe spot. Walk through every control slowly. Check that throttle starts from zero with no creep. Steering centers perfectly. Elevator and rudder move equal distances left and right.
Run the sticks through fast moves and slow ones. Listen for any buzzing or see any lag. If something feels off, go back to the menu and adjust only that channel. Small changes make big differences.
For planes, taxi around and lift the tail to check pitch and roll. For cars, drive in circles and watch for pulling. Drones need a stable hover test. Boats should track straight in calm water. Each model shows you exactly what needs one more tweak.
Take notes on what feels right. Many hobbyists keep a small cheat sheet with their favorite settings. This live testing turns good calibration into great calibration.
Common Mistakes Beginners Make and How to Dodge Them
You might rush the centering step and end up with constant drift. Slow down and double-check those numbers. Another common slip is forgetting to re-bind after you update firmware. Always bind fresh if you change settings deep in the menu.
Some people set endpoints too high and hear servos grind. Back them off a few percent and test again. Others ignore expo and fight with twitchy controls. Add a touch and feel the instant improvement.
Watch your battery voltage too. Low power makes calibration numbers jump around. Always use fresh juice. If you swap receivers or models, start the whole process over. Settings rarely carry across different gear.
You avoid these traps easily when you follow the steps in order. Patience pays off big time here.
Troubleshooting When Things Do Not Feel Right
Sometimes the model still pulls to one side even after you center everything. Check the mechanical linkage first. A bent pushrod or loose screw hides the real problem. Straighten or tighten, then recalibrate.
If the receiver loses signal at a distance, move antennas apart and away from metal. Re-bind in a clear area. For jittery servos, look at the power wiring. Loose plugs cause noise.
Throttle that creeps when you let go usually needs a lower dead zone or more sub-trim. Most transmitters have a throttle cut switch you can set for safety. Use it during tests so the motor stays off until you arm it.
Screen numbers that bounce wildly point to a bad gimbal. Clean the sticks gently or check for damage. These fixes take minutes once you know where to look. Your RC transmitter works like new again.
Tips for Different RC Models You Might Fly or Drive
Planes need extra care on elevator and aileron. Set dual rates low for takeoff and landing. Add a touch of expo so gentle inputs keep the nose steady. Check flaps separately if your model has them.
RC cars and trucks focus on steering endpoints. Make sure wheels turn equal left and right without rubbing the body. Throttle curve can feel touchy on powerful brushless setups, so expo helps here too.
Drones and quads love strong expo on all axes for smooth camera shots. Set failsafe so the drone drops or hovers if signal drops. Test in a wide open field first.
Boats and yachts need rudder limits so the servo does not oversteer in waves. Keep throttle linear because water drag changes fast. Each model teaches you something new about calibration.
You mix and match these tips as your collection grows. The core steps stay the same, but small tweaks make each model shine.
Advanced Tricks to Take Your Calibration Further
Once you master the basics, try mixing channels for special functions. Some transmitters let you mix rudder with aileron for coordinated turns. Set it up in the mix menu and test gently.
You can also create custom curves for throttle or pitch. These graphs let you fine-tune power delivery so the model feels exactly how you want. Start simple with three or five points on the curve.
Telemetry settings give you live data on battery voltage or signal strength. Set alarms so you never lose control because of a dead pack. These extras turn a good transmitter into a pro-level tool.
Experiment on the ground before you fly. Save your settings to a model memory slot so you can switch between planes or cars instantly. You build a library of perfect setups over time.
Keep Your Transmitter in Top Shape for Years
Calibration lasts longer when you care for the gear. Store your transmitter in a cool, dry case away from direct sun. Wipe the sticks and switches with a soft cloth after dusty days.
Check the battery contacts every few uses. Corrosion sneaks up fast in humid spots. Update firmware when the manufacturer releases it, but always back up your settings first.
Re-calibrate after any big crash or when you change servos or linkages. Small changes in the model can shift the feel. A quick ten-minute session brings everything back to perfect.
You enjoy the hobby more when your tools stay reliable. A well-calibrated RC transmitter becomes your favorite piece of gear.
Final Thoughts on Mastering Your RC Transmitter
You just walked through every step to calibrate your RC transmitter like a pro. From powering up safely to setting expo and testing live, you now hold the keys to smooth, precise control. No more guessing why your model acts funny. You fix it fast and get back to the fun.
Take your time on the first try. Read the screen, watch the servos, and listen to the model. Each session teaches you something new about your gear. Before long, you help friends calibrate their setups too.
Grab your transmitter and start right now. You will feel the difference on the very next run. The sky, track, or water waits for you. Happy flying, driving, or sailing. Your perfectly tuned RC transmitter is ready to go whenever you are.
(Word count: 2,847)