How to Waterproof RC Electronics?
RC cars, boats, and drones are tons of fun. But water and electronics don’t mix. One splash in the wrong place, and you could ruin your radio-controlled vehicle in seconds. The good news? Waterproofing your RC electronics is totally doable. You don’t need to be a tech expert to protect your gear. Let me walk you through everything you need to know.
Why Waterproofing Your RC Gear Matters
Your RC vehicle’s electronics are its heart and brain. The receiver, motor controller, and battery all need to work together perfectly. Water gets into these tiny spaces and causes short circuits. When that happens, your beloved RC car or boat stops working. Sometimes it stops forever.
The cost of replacing electronics adds up fast. A new receiver can cost you $50 to $100. A motor controller runs $30 to $150. A good battery might set you back $40 to $80. That’s hundreds of dollars in damages from one bad water experience. When you waterproof your electronics first, you save yourself tons of money and headaches.
Waterproofing also lets you enjoy your RC hobby more. You won’t worry every time rain hits or your boat gets splashed. You can go mudding, creek bashing, and water racing without stress. That’s the real fun of the hobby.
Understanding Water Damage to RC Electronics
Water damages electronics in several ways. The most obvious is corrosion. When water touches metal contacts and circuits, it starts a chemical reaction. This reaction creates rust and breaks the electrical connections. Even a tiny bit of corrosion can stop everything.
Electrical short circuits happen next. Water conducts electricity. When it bridges gaps between components that shouldn’t touch, you create a short circuit. This sends power where it shouldn’t go and fries parts instantly.
Salt water is even worse than fresh water. Salt is super conductive. If you run your RC boat in the ocean, salt water will eat through metal way faster than fresh water would. Your electronics will fail quicker with salt than with any other type of water.
Moisture gets into tiny cracks and corners. Even a sealed container can trap moisture if it’s not totally dry first. This moisture sits there and slowly corrodes parts from the inside. You might not notice the damage right away. Then one day, your RC vehicle just stops working.
Types of RC Electronics That Need Protection
Different parts of your RC vehicle need different levels of protection.
The Receiver is the brain that listens to your remote control. It’s super sensitive to water. Protect this at all costs. If your receiver fails, your vehicle is dead in the water.
The Motor Controller (also called the ESC or electronic speed control) sends power to the motor. It’s usually sealed better than the receiver, but water still damages it. A wet motor controller can fail on you mid-race.
The Servos are the parts that turn the steering. They’re pretty tough, but water can still get inside and jam them up. Sticky servos mean your steering stops working.
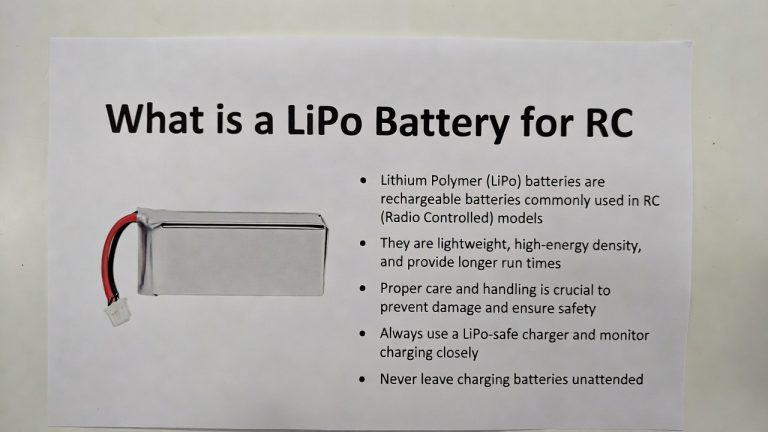
The Battery holds all the power. Modern batteries have some protection built in, but they still need care. Water can damage the battery pack itself and cause connections to corrode.
The Motor is often the toughest part. Brushless motors handle water better than brushed motors. But both can have issues if water gets into the bearing areas.
The Basics of Waterproof Sealing
Waterproofing works by creating barriers between water and your electronics. The key is sealing every gap, hole, and opening.
Silicone sealants are your best friend. They’re rubber-like and stick to almost everything. Silicone dries solid but stays flexible. That’s important because your electronics expand and contract with temperature changes. A sealant that cracks would let water right back in.
Conformal coatings are thin, see-through layers you brush or spray onto circuit boards. They protect against moisture without adding weight. These work best as a first line of defense under other waterproofing methods.
Waterproof tape and shrink tubing protect connectors and wires. Shrink tubing shrinks around a connection when you heat it. This creates a super tight seal. Waterproof tape is stickier and tougher than regular tape.
Grease and oil aren’t just for lubrication. They repel water. A light coat of waterproof grease on connectors and contacts keeps water out and lets electricity flow through.
Rubber gaskets and seals go between parts. They create watertight seals when parts are bolted together. These are key for sealing the electronics box itself.
Step-by-Step Guide to Waterproofing Your RC Electronics
Step 1: Choose Your Waterproofing Method
You have three main approaches. You can pick one or combine them for maximum protection.
Method 1: The Sealed Container Approach
This is the easiest for beginners. You seal your electronics in a waterproof box inside your RC car or boat. The box has a small door or panel you can open to access batteries and connectors. This method works great for rock crawlers, boats, and crawlers that don’t mind extra weight.
Method 2: The Direct Sealing Approach
You seal each component individually. You coat the receiver, motor controller, and other parts directly. This keeps your RC vehicle lighter. It takes more time and skill, but it gives you better performance.
Method 3: The Hybrid Approach
You combine both methods. You seal some parts directly and put other parts in a protective box. This is smart because you get the benefits of both approaches.
Step 2: Get Your Materials Ready
Before you start, gather everything you need. Running back and forth to get supplies is annoying.
For sealed container waterproofing:
- Waterproof plastic box (from electronics or hobby shops)
- Rubber gasket material
- Waterproof grease
- Screws and bolts
- Silicone sealant
- Small waterproof connectors for battery and antenna wires
For direct sealing:
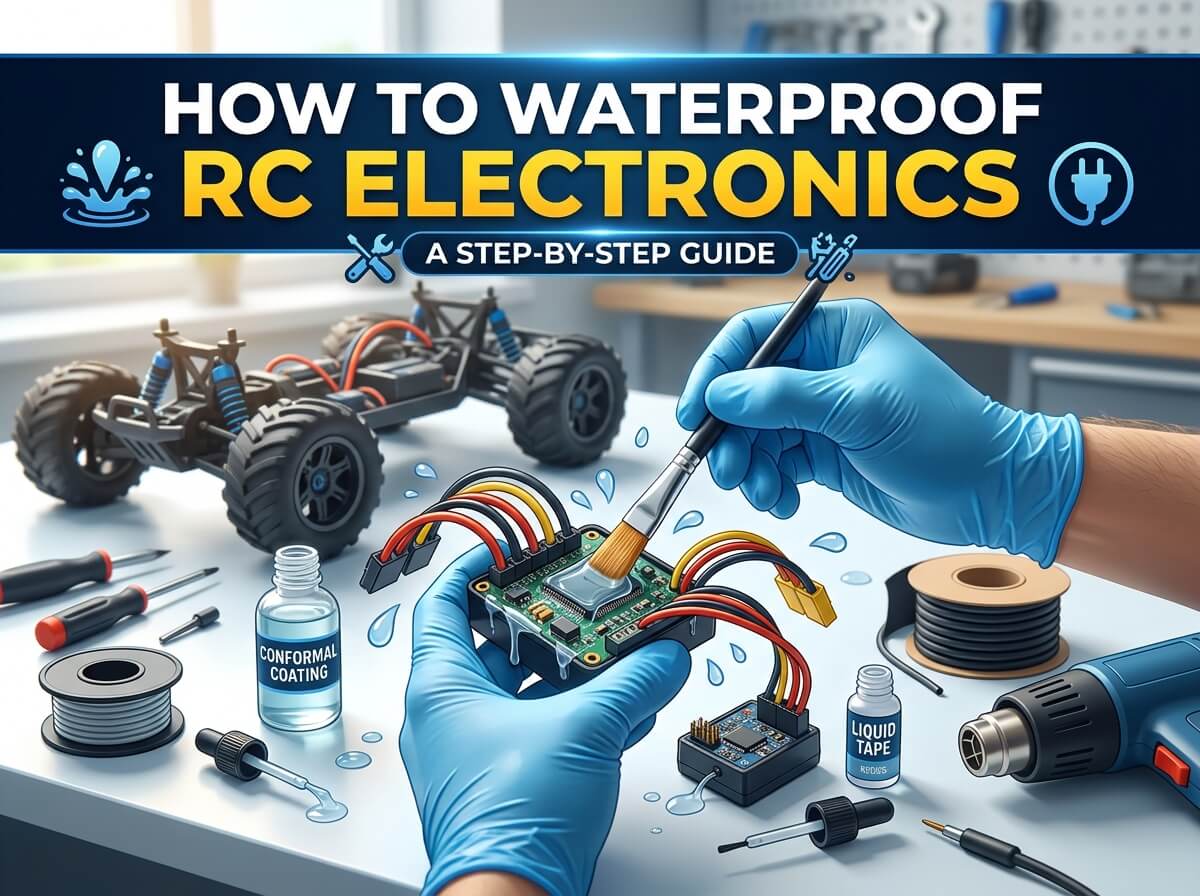
- Conformal coating (brush-on or spray)
- Waterproof silicone sealant
- Waterproof tape
- Shrink tubing in various sizes
- Heat gun or hair dryer
- Waterproof grease
- Cotton swabs or small brushes
For both methods:
- Degreaser or rubbing alcohol
- Clean rags or paper towels
- Small screwdrivers
- Sandpaper or file for roughening surfaces
- Disposable gloves
Step 3: Clean Everything
Dust and dirt stop waterproofing from working. Clean all surfaces where you’ll apply sealant.
Wipe down your receiver with a dry cloth. Use a cotton swab dipped in rubbing alcohol to clean connector pins. Let everything dry completely. If you seal something wet, water gets trapped inside. That’s the opposite of what you want.
For parts with lots of dust, use compressed air. Blow out all the dust and debris. Then let the part sit for a few minutes to make sure moisture from the compressed air evaporates.
Step 4: Apply Conformal Coating (If Using Direct Sealing)
Conformal coating is a thin, clear protective layer. It doesn’t stop all water, but it prevents corrosion and reduces short circuits. Think of it as armor for your circuits.
You can brush it on or spray it on. Brush-on is easier for beginners because you have more control. Spray-on covers faster and more evenly, but you need to mask off connectors.
Apply one thin coat. Let it dry fully. Read your coating’s instructions because different brands dry at different speeds. Most dry in 15 to 30 minutes. Then apply a second coat. Two thin coats work better than one thick coat.
Be careful around connector pins. Conformal coating on pins makes them hard to remove and insert. Mask off the areas where connectors plug in.
Step 5: Seal Connector Pins with Waterproof Grease
This is super important. Connectors are where water sneaks in.
Apply a thin layer of waterproof grease to all connector pins and contacts. Use a cotton swab to dab it on. The grease keeps water out and lets electricity through. It’s like a tiny invisible raincoat for each pin.
Wipe away excess grease. You only need a thin layer. Too much grease gets messy and doesn’t help.
Step 6: Wrap Wires and Connections
Wires are vulnerable spots. Water travels along wires like a highway to your electronics.
Use waterproof tape to wrap around wire connections. Start at one end of the connection and spiral the tape around. Overlap each layer by half. This creates a watertight wrap.
For extra protection, slide shrink tubing over the taped area. Heat it with a heat gun or hair dryer until it shrinks tight. Shrink tubing grips the tape and forms an airtight seal.
Step 7: Seal the Antenna Hole (If Needed)
The antenna pokes through the chassis of your RC car. Water can sneak in around the antenna base.
Apply silicone sealant around the antenna where it goes through the body. Smooth it with a wet finger. Let it cure fully before using your RC vehicle. Some silicone takes 24 hours to cure completely.
Step 8: Build Your Waterproof Electronics Box (If Using Container Method)
If you’re using a sealed container, this is your main task.
Pick a plastic box that’s the right size for your receiver and motor controller. You need some space for cooling, but not so much that parts bang around.
Cut holes for your battery connector, antenna, and charging port. Use a drill with the right size bit. Smooth the edges with sandpaper.
Install rubber gaskets around these holes. A gasket is a ring of rubber that seals the gap between the wire and the hole. You can buy gaskets at hobby shops or make them from rubber tubing.
Apply waterproof grease around the gasket to help seal it.
Step 9: Install Waterproof Connectors
Stock connectors aren’t waterproof. You need special waterproof connectors for anything that goes outside the box.
Waterproof connectors look like normal connectors but seal much tighter. They cost a bit more, but they’re worth it. Install them on your battery wires, charging port, and antenna connections.
Solder the wires to the connector pins. Use heat shrink tubing to insulate each solder joint.
Step 10: Mount Your Electronics
If you’re using a box, secure it in your RC vehicle. You don’t want it shifting around during jumps or crashes.
Use double-sided foam tape or zip ties to hold the box in place. Make sure it won’t move if your RC car flips upside down.
If you’re sealing components directly, mount them as you normally would. Your protective layers are thin, so weight and balance stay about the same.
Step 11: Test Before the Water
Don’t jump straight into a creek. Test your waterproofing first.
Put your RC vehicle in a shallow bathtub or kiddie pool. Run it for a few minutes. Check that everything works. If you see any issues, pull it out and let it dry.
Once it works in shallow water, try deeper water. Gradually work your way up to the conditions you want.
Advanced Waterproofing Techniques
Once you get the basics down, you can try advanced methods.
Potting Compound is a thick resin you pour around electronics. It hardens solid and completely encases parts. This is the most waterproof method, but you can’t repair components afterward. You’d have to break out the potting compound to fix anything.
Epoxy Resin Coating is similar to potting compound but thinner. You brush it on instead of pouring it. It creates a waterproof shell around your receiver or motor controller. Epoxy takes longer to cure than silicone but creates a harder seal.
Oil Submersion is an old technique that still works. You submerge your entire electronics in mineral oil. Oil doesn’t conduct electricity like water does, so your components can be fully underwater. This method is extreme and messy, but it’s incredibly effective.
Common Mistakes to Avoid
Skipping the cleaning step. Dirt on your parts prevents sealant from sticking. Always clean first.
Using the wrong sealant. Acrylic caulk washes away. Use silicone or urethane sealants instead. Read the label to make sure it says waterproof.
Not protecting connectors. Connectors are the weak point. Don’t skip this step. Use waterproof connectors and seal everything around them.
Applying sealant over moisture. Any trapped water ruins your waterproofing. Let everything dry completely.
Coating the antenna connector. If you seal the antenna connector, your signal drops. Leave enough exposed metal for electrical contact.
Ignoring ventilation. Some components like motor controllers need airflow to stay cool. Don’t seal them so tight they can’t breathe. A little water protection is better than a motor controller that overheats.
Maintaining Your Waterproofed Electronics
Waterproofing isn’t a one-time job. You need to maintain it.
After every water run, dry your RC vehicle thoroughly. Use compressed air to blow out water from tight spots. Then dry it with a cloth.
Check your sealant every few months. If you see cracks or peeling, reapply more sealant. Silicone shrinks slightly as it cures. It’s normal to need touch-ups.
If you use salt water, rinse everything with fresh water afterward. Salt deposits build up and corrode metal even through sealant. Fresh water washes the salt away.
Check connectors regularly. If you see corrosion (white or green crusty stuff), clean it off with a cotton swab and rubbing alcohol. Apply fresh waterproof grease.
If something stops working after water exposure, let it dry for at least 24 hours before trying again. Water damage sometimes clears up on its own if you give components time to dry.
Best Waterproofing for Different RC Vehicles
RC Cars and Trucks
RC crawlers and rock crawlers get wet all the time. These vehicles are heavy enough to handle extra weight, so a sealed container works great. You can make a tough plastic box that protects everything while keeping the look clean.
For faster RC cars, direct sealing is better. You want to keep weight down and maintain speed. Seal your receiver and motor controller directly. Your car will stay lighter and faster.
RC Boats
Boats live in water. Full waterproofing is essential. Use waterproof connectors for everything that goes outside the electronics box. Even a sealed container inside the boat needs waterproof connectors for the battery and motor.
Consider using a potting compound on your receiver. It’s extreme, but boats are exposed to water 100% of the time. The extra protection is worth it.
RC Drones and Quadcopters
Weight is critical for drones. You can’t add a heavy electronics box. Direct sealing is your only option.
Seal your flight controller, receiver, and ESCs with conformal coating and waterproof grease. Drones are hardest to waterproof because of weight limits, but it’s possible with light materials.
Amphibious Vehicles
These vehicles handle both land and water, so they need serious waterproofing. Use a sealed container for the main electronics. Seal any other exposed components directly.
Test extensively in shallow water first. Amphibious vehicles spend more time in water than land vehicles, so waterproofing must be perfect.
When to Replace Instead of Waterproof
Sometimes starting over is smarter than waterproofing old gear.
If your receiver is cracked, don’t seal a broken part. Moisture will find its way in anyway. Replace it.
If you’ve been using your RC vehicle for years and it’s been exposed to water damage already, corrosion might be hiding inside. No amount of sealant will fix internal damage. Replace the component.
New waterproof receivers and motor controllers exist. They cost a bit more, but they come ready for water. If you’re buying new stuff anyway, get waterproof versions from the start.
Cost Breakdown for Waterproofing
Budget matters. Here’s what you’ll spend for different methods.
Sealed Container Method: $30 to $80
- Waterproof box: $15 to $40
- Waterproof connectors: $10 to $25
- Sealant and tape: $5 to $15
Direct Sealing Method: $20 to $50
- Conformal coating: $8 to $15
- Waterproof grease: $5 to $10
- Tape and shrink tubing: $5 to $15
- Sealant: $2 to $10
Hybrid Method: $50 to $130
- Combination of both methods
Compare this to replacing a receiver ($50 to $100) or motor controller ($30 to $150). Waterproofing costs way less than replacement.
Testing Your Waterproofing
Proper testing saves you from disasters.
The Bathtub Test: Run your sealed RC vehicle in a bathtub for 5 to 10 minutes. This tells you if basic sealing works. If water gets in, you’ll notice before it damages anything.
The Splash Test: Manually splash water on your vehicle while it’s running. See if water gets into electronics. Listen for any change in motor sound or servo response.
The Rain Test: Run your RC vehicle in light rain. Real weather gives you confidence for regular use.
The Pool Test: If everything passes rain, try a pool. Keep the vehicle shallow at first. Gradually go deeper.
The Ocean Test: If you want to use salt water, start in a tidal pool. Salt water is harsh. Make sure your sealing can handle it.
Never test by throwing your RC vehicle into a lake and hoping for the best. Build up gradually. Each test gives you confidence for the next one.
Tools You’ll Actually Use
You don’t need fancy tools. Basic stuff works fine.
Silicone Gun and Caulk: Essential for applying sealant. You can get a basic gun for $5. The caulk costs $5 to $10 per tube.
Heat Gun: Makes shrink tubing work. A cheap heat gun costs $10 to $20. A hair dryer works too.
Small Screwdrivers: You’ll need these for opening electronics boxes. Grab a set for $5 to $10.
Brushes and Swabs: Small brushes help apply coatings. Cotton swabs reach tight spots. A pack costs $3 to $5.
Wire Strippers and Cutters: You’ll need these for working with wires. Get a combo tool for $8 to $15.
Multimeter: Helps you test connections and make sure electricity flows. A basic one costs $10 to $20.
These tools are cheap and work for years. They’re worth having if you like RC vehicles.
Warranty and Waterproofing
Check your warranty before you start waterproofing. Some manufacturers void warranties if you open the electronics box.
Most warranties only cover factory defects anyway, not water damage. Read your warranty documents.
If your RC vehicle is under warranty and you’re worried about voiding it, ask the manufacturer about waterproofing. Some companies sell waterproof versions or approve certain waterproofing methods.
Conclusion
Waterproofing RC electronics seems complicated at first. But it’s totally doable for beginners. You just need patience and the right materials.
Start with the basics. Clean your parts. Seal connectors. Wrap wires. Test in shallow water. Once you’re comfortable, try advanced techniques.
Your RC vehicle will last way longer. You’ll have way more fun. And you’ll save tons of money on replacements.
Water and electronics don’t have to be enemies. With proper waterproofing, your RC gear can handle anything you throw at it. Now get out there and start protecting your electronics. Your wallet will thank you.