How To Make Rc Car With Arduino
Key Takeaways
- An Arduino RC car uses a small microcontroller to read commands and drive motors.
- The core parts are an Arduino board, a motor driver, DC motors, a power source, and a wireless remote module.
- Wiring and power safety matter as much as the code, so check connections before switching on.
- Beginners can start with simple forward, reverse, and turning code and add features later.
Introduction
This guide explains how to make an RC car with Arduino from the ground up. It is written for readers who have never built a robot or written code. You will learn what each part does and how the pieces connect.
By the end, you will know the steps to build a basic car that moves when you send it commands. You will also see how to troubleshoot common problems.
What an Arduino RC Car Is and Why Beginners Build One
An Arduino RC car is a small remote-controlled vehicle guided by an Arduino board. The board acts as the brain. It receives signals from a remote and tells the motors how to move.
What Arduino Is and Why It Suits Beginners
Arduino is a family of small circuit boards that run simple programs. You write code on a computer and upload it over a USB cable. A large community and many online examples make it easy to start.
How a Remote-Controlled Car Works at a Basic Level
The remote sends a command over a wireless link, usually radio or Bluetooth. The receiver picks up the signal, the Arduino interprets it, and the motor driver sends power to the wheels.
Skills You Will Practice on This Project
This project teaches basic wiring, reading circuit diagrams, and using a breadboard. Small wiring mistakes are the most common cause of failed builds, so learning to spot them is a useful skill.
Parts and Tools You Need Before You Start
Gather your parts before you begin. Having everything ready prevents stop-and-start frustration. You can buy the parts separately or as a beginner kit.
Core Components: Arduino Board, Motor Driver, and DC Motors
The Arduino board is the controller. Beginners often start with the Uno or Nano. The board connects to your computer by USB for programming.
A motor driver lets the Arduino control motors that need more current than the board can supply. DC motors spin the wheels. A basic car typically uses two motors on the rear axle.
Power Supply Options: Battery Packs and Voltage Basics
Voltage is the push that drives electricity through a circuit. Motors need their own power source, separate from the Arduino’s USB power. A battery pack, often made of several AA cells, is a common choice.
Check the voltage rating of your motors and driver before buying a battery. Too high a voltage can damage parts. Match the battery to your kit’s instructions.
Radio or Bluetooth Remote Control Modules
A radio module, such as a 2.4 GHz transmitter and receiver pair, sends button presses wirelessly to the car. These modules are widely available and reliable over short distances.
Bluetooth modules work with a phone app instead of a dedicated remote. Many Arduino boards pair with a phone through a module like the HC-05. The wiring and code differ between the two options, so pick one before you buy parts.
Chassis, Wheels, and Mounting Hardware
The chassis is the frame that holds everything together. Kits often include a plastic or acrylic base with pre-drilled motor holes. A sturdy chassis keeps wires from pulling loose while driving.
Wheels attach to the motor shafts. Bolts, nuts, and standoffs hold the board and driver in place. Good mounting prevents short circuits from parts touching the metal frame.
Basic Tools, Jumper Wires, and a Breadboard
A small screwdriver, wire strippers, and pliers cover most assembly tasks. A soldering iron helps but is not required for a basic build. A breadboard lets you connect parts without soldering.
Jumper wires are short wires with pins on each end. They connect the Arduino, driver, and receiver. An inexpensive multimeter is useful for checking voltage and continuity.
How the Pieces Work Together
Each part has one clear job, and the parts pass information in a chain. Knowing that chain helps you wire the car correctly and find problems faster.
How the Arduino Controls Motor Speed and Direction
The Arduino does not spin the motors directly. It sends digital and PWM signals to the motor driver. PWM, or pulse-width modulation, switches power on and off rapidly to control average speed.
Two control pins set the direction current flows through each motor. Changing those settings reverses the spin without rewiring.
What an H-Bridge Motor Driver Does
An H-bridge is a circuit that lets current flow in either direction through a motor. On a diagram, it looks like the letter H. Many motor driver modules, such as the L298N, contain H-bridges.
The driver also protects the Arduino from the higher current the motors need. Without it, the board could be damaged.
How Wireless Signals Send Commands From the Remote
When you press a button on the remote, it sends a coded signal over the air. The receiver on the car decodes that signal and passes a value to the Arduino, which decides what action to take.
Range depends on the module, the antenna, and the surroundings. Walls and metal can reduce it, so test the link at short distance before driving far.
Reading Inputs From Sensors and Joysticks
Some remotes use joysticks instead of buttons. A joystick sends analog values that change smoothly as you move it. The Arduino reads these values through its analog pins and converts them into motor speed and direction.
Step-by-Step Guide to Building Your First RC Car
Build the car in stages and test after each one. This makes problems easier to find and shows how each part contributes to the result.
Assembling the Chassis and Attaching the Motors
Mount the motors to the chassis using the brackets or holes provided. Make sure they sit firmly, then attach the wheels and spin them by hand to check for smooth movement.
Secure the battery holder away from moving parts. Loose batteries can slide and cause shorts or disconnects while driving.
Wiring the Motor Driver to the Arduino
Connect the motor driver to the Arduino using the pins listed in your driver’s instructions. Each motor needs two control pins for direction and one PWM pin for speed. Label or color-code your jumper wires as you go.
Check every connection against the wiring diagram before moving on. Reversed pins are a common beginner mistake.
Connecting the Power Supply Safely
Connect the battery to the motor driver’s power input, not directly to the Arduino’s pins. Reversed polarity can damage the driver and the board, so confirm the positive and negative leads.
Keep the battery disconnected until all wiring is checked.
Adding the Wireless Receiver and Remote
Wire the receiver to the Arduino according to the module’s pinout. Most receivers need power from the 5V pin and a shared ground. Connect the signal pins to the digital pins your code will read.
Pair the remote with the receiver if your module requires binding. Confirm the receiver shows a signal before connecting the motors.
Uploading a Simple Arduino Sketch
Install the Arduino IDE, the free software used to write and upload code. Connect the board with a USB cable and select the correct board and port. A sketch is a program written for an Arduino.
Upload a short test sketch first, such as one that blinks the built-in LED. This confirms the board and computer communicate before you add more complex code.
Testing Forward, Reverse, and Turning Movements
Lift the car so the wheels spin freely. Run a test program that drives each motor forward, then in reverse, at low speed. Confirm the direction matches your plan.
When both motors work, test turning by running one side faster or in reverse. Place the car on the floor only after the wheels respond correctly, and start slowly.
Writing Your First Arduino Code for Driving the Car
Your code tells the car how to respond to commands. Start with a short program and add features over time. Clear, simple code is easier to fix when something goes wrong.
Basic Code Structure: Setup and Loop Functions
Every Arduino sketch has two main functions. The setup function runs once at startup and configures the pins. The loop function runs repeatedly and holds the main logic.
In an RC car, setup declares which pins are inputs and outputs. The loop reads the receiver, decides on an action, and sends the result to the motor driver.
Controlling Motors With PWM for Speed Adjustment
PWM sets a speed value between zero and the maximum. The analogWrite function sends this value on PWM-capable pins. Lower numbers give slower speeds and higher numbers give faster ones.
Start with a low maximum speed while you learn. Increase it gradually once the car drives predictably. Smooth speed changes also protect the gears and the battery.
Mapping Remote Buttons or Joystick Values to Movement
Map each remote button to one action, such as forward or left. For joysticks, the map function converts a range of analog readings into motor speeds. This lets small stick movements produce gentle speed changes.
Write down which input does what before coding. This helps you avoid mixing up commands later.
Common Coding Mistakes and How to Fix Them
A frequent mistake is using the wrong pin number. Compare the numbers in your sketch with your wiring. Another common error is a missing semicolon, which the IDE flags when you verify the code.
If the car behaves oddly, add short messages with the Serial print function. These messages appear in the Serial Monitor and show what the code is doing.
Troubleshooting Common Problems
Most issues in a first build have simple causes. Work through them in order and change one thing at a time.
Motors Not Turning or Turning the Wrong Way
If a motor does not turn, check the power connection to the driver first. Then confirm that the enable and direction pins match your code. Swapping the two motor wires reverses rotation without changing the code.
Car Losing Connection to the Remote
A weak link often comes from a low remote battery or excessive distance. Test at a shorter range and move away from large metal objects. Check that the receiver and remote are still paired.
Battery Drain and Weak Power Issues
Batteries lose charge faster under heavy load, especially when motors stall. Recharge or replace the pack and keep the car from straining against obstacles. Weak power can also reset the Arduino, so check the voltage with a multimeter.
Checking Wiring and Using Serial Monitor for Debugging
Recheck every wire against the diagram, since loose or swapped connections cause many faults. Use the Serial Monitor in the Arduino IDE to view messages from your code. These readings show if the receiver and Arduino exchange the right values.
Ways to Upgrade and Expand Your RC Car
Once the basic car drives well, you can add new features. Each upgrade teaches a new skill. Add them one at a time so you can track any new problems.
Adding Obstacle Detection With Ultrasonic Sensors
An ultrasonic sensor sends out sound pulses and measures the echo to estimate distance. The Arduino can stop the car when an object is too close. This is a common first sensor project for beginners.
Using Line-Following Sensors for Autonomous Driving
Line-following sensors detect a dark line on a light surface. The code adjusts the motors to keep the car on the line. This project introduces basic feedback control.
Bluetooth Control Through a Phone App
A Bluetooth module lets you drive the car from a phone. Phone apps send simple commands to the Arduino. This can replace or supplement the physical remote.
Improving Chassis Design and Suspension
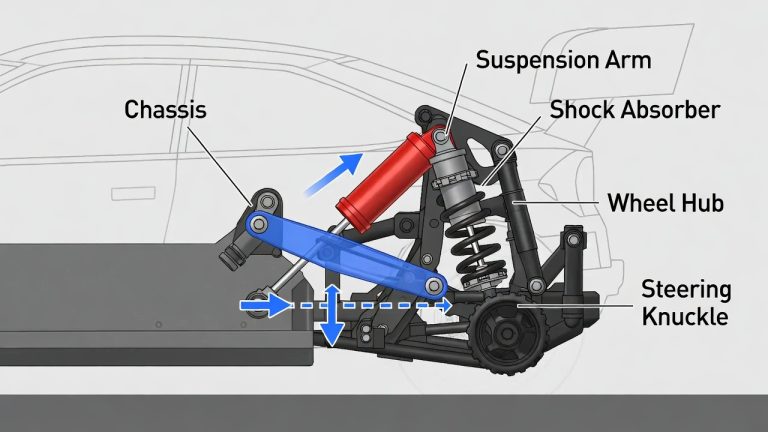
A stiffer chassis and better wheels can improve handling on uneven ground. Simple suspension helps the wheels stay in contact with the floor. Make these changes gradually and test each one.
Comparing Arduino RC Car Kits and Building From Scratch
Beginners can buy a complete kit or source parts individually. Each path has trade-offs in cost, learning and flexibility. The right choice depends on your goals.
Pre-Built Kits: Pros, Cons, and Who They Suit
Kits include matching parts and instructions. This reduces guesswork and helps you finish sooner. The downside is that you may learn less about picking components.
Custom Builds: Flexibility Versus Learning Curve
Building from scratch lets you pick every part. It teaches more about compatibility and voltage. It also takes longer and can cause more early mistakes.
Arduino Boards Compared: Uno, Nano, and Mega for RC Projects
The Uno is a common, easy-to-use board with enough pins for a basic car. The Nano is smaller and fits tight chassis designs. The Mega has more pins, which suits larger projects with many sensors.
Frequently Asked Questions
Do I need prior coding experience to build an Arduino RC car?
No prior experience is strictly required. Beginners can start with short example sketches and change them step by step. Learning the code alongside the build works well for most people.
What is the difference between an H-bridge and a motor driver module?
An H-bridge is the circuit that controls current direction through a motor. A motor driver module is a board that contains one or more H-bridges, along with protection and connectors for easy wiring. The H-bridge is the core idea, and the module packages it for beginners.
Can I control an Arduino RC car with my smartphone?
Yes, if you add a Bluetooth module such as the HC-05. A phone app then sends commands to the Arduino over a wireless link. The wiring and code differ slightly from a radio remote, so choose one approach before you buy parts.
How long does it usually take a beginner to finish this project?
The time varies with prior skills, the kit chosen, and how much debugging is needed. Working in short sessions and testing after each stage keeps progress steady. Plan for patience, since wiring checks take time.
Is it safe to power the motors with a lithium battery pack?
Lithium packs can deliver high current and must be handled with care. Use a pack that matches your motor and driver voltage, and follow the manufacturer’s charging and storage guidance. Never leave charging batteries unattended, and avoid short-circuiting the leads.
Conclusion
An Arduino RC car is a practical way to learn wiring, power basics and simple programming. The core parts are the Arduino board, a motor driver, DC motors, a power source and a wireless receiver. Building in stages and testing after each step keeps problems small and easy to fix.
Start with forward, reverse and turning code, then add sensors or Bluetooth control as your confidence grows. Careful wiring and battery safety matter as much as the code. With patience, the first drive becomes a useful foundation for many later electronics projects.

Peterson is an RC hobby enthusiast and product reviewer with a passion for remote-controlled cars, trucks, boats, drones, and accessories. He enjoys testing the latest RC products, comparing features, and sharing practical buying guides to help beginners and experienced hobbyists make informed decisions. Through RCThing.com, Peterson provides honest reviews, maintenance tips, and expert advice to help readers get the most from their RC adventures.