How To Bind Rc Transmitter To Receiver
Binding an RC transmitter to a receiver is a vital task for anyone involved in remote-controlled hobbies. This process creates a unique digital link between your remote and the vehicle, drone, or plane you want to control. Learning how to bind your RC transmitter to your receiver ensures that your equipment responds only to your specific commands. This guide explains the standard procedures for establishing a reliable connection between your radio components. You will discover the basic principles of radio frequency communication and the steps needed to synchronize your devices. Following these instructions carefully will help you get your model ready for operation with confidence.
Key Takeaways
- Binding creates a secure, unique digital connection between your transmitter and receiver.
- Always check your battery levels before starting the synchronization process.
- Keep your transmitter and receiver close together during the initial setup.
- Follow the specific instructions provided by your equipment manufacturer for best results.
How Radio Communication Works
RC systems rely on radio frequency signals to send instructions from the controller to the model. A transmitter acts as the sender, converting your stick movements into digital data packets. The receiver, mounted inside the model, listens for these packets and translates them into movements for the servos or motors. Modern systems use 2.4GHz technology to maintain a stable link. This frequency allows many people to operate their models at the same time without signal overlap. Each transmitter has a unique identification code that it shares with the receiver during the binding process. Once the receiver recognizes this specific code, it ignores all other signals in the air. This handshake ensures that your model only reacts to your transmitter. If the connection breaks, the receiver usually enters a fail-safe mode to prevent the model from flying or driving away uncontrollably.
Preparing Your Equipment for Binding
Preparation is essential for a smooth binding experience. Before you begin, gather all necessary components, including the transmitter, receiver, and your model’s power source. Clear your workspace of any metal objects that might interfere with radio signals.
Checking Power and Battery Levels
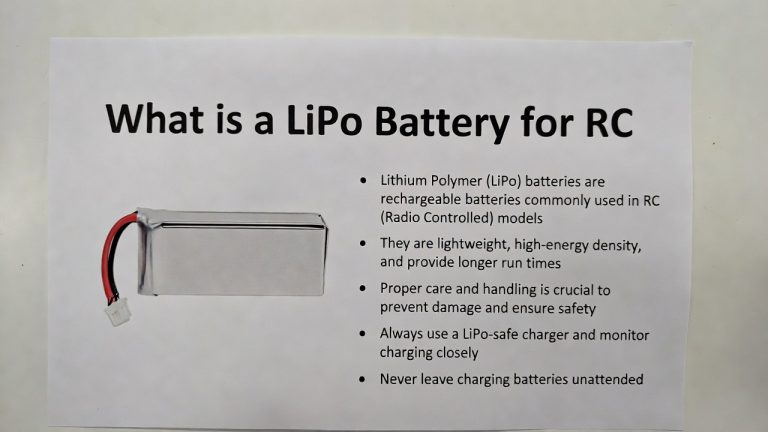
A weak battery can cause the binding process to fail or time out before it finishes. Ensure your transmitter battery is fully charged to provide a consistent power output. Similarly, check that the receiver battery or the electronic speed controller power source is ready. If the voltage drops during the binding sequence, the receiver might reset. This interruption prevents the unit from storing the transmitter’s unique identification code correctly. A stable power supply throughout the process is the foundation of a successful link.
Positioning Your Transmitter and Receiver
Distance plays a significant role during the initial synchronization. Most manufacturers recommend placing the transmitter and receiver within a few feet of each other. Being too close can sometimes overwhelm the receiver’s antenna, while being too far can lead to a weak signal. Remove the propeller or blades from any aircraft before you start. This safety precaution prevents the motor from spinning unexpectedly if the system initializes while you work. Place your transmitter on a flat surface and ensure the receiver is correctly wired to the power source.
Step-by-Step Guide to Binding Your RC System
The specific buttons or sequences vary depending on the brand and model of your radio gear. Always consult the manual that came with your equipment for brand-specific details. Despite these variations, the general logic of the process remains consistent across most digital systems.
Activating the Binding Mode on the Receiver
Most receivers feature a small button labeled “Bind” or a port meant for a binding plug. If your unit uses a plug, insert it into the designated pins before connecting the power. Power on the receiver, and you should see an LED light start to flash. The flashing light indicates the receiver is in search mode. It is actively looking for a transmitter that is also broadcasting a signal. Do not turn off the power yet, as the receiver needs to stay active to complete the handshake.
Initiating the Signal from the Transmitter
With the receiver flashing, turn on your transmitter while holding the bind button or navigating to the bind menu on the screen. The transmitter will begin broadcasting its unique identification code. Some remotes provide an audible tone or a screen message to show that the binding mode is active. Hold the transmitter steady while it sends the signal to the receiver. This phase usually lasts for a few seconds. During this time, the internal processors of both devices verify the signal integrity and lock in the connection.
Verifying a Successful Connection
Observe the light on the receiver once the process completes. In most cases, the light will stop flashing and turn into a solid glow. This change confirms that the receiver has successfully captured and saved the transmitter’s identification code. Power down both the transmitter and the receiver to finalize the setup. Then, turn them back on in the correct order, which is usually the transmitter first, followed by the receiver. Move your control sticks to verify that the servos and motors respond as expected.
Troubleshooting Common Binding Issues
Sometimes the connection does not happen on the first attempt. If the receiver light continues to blink or does not light up at all, restart the entire process. Ensure that you are using compatible hardware, as some receivers only work with specific transmitter protocols.
Dealing with Signal Interference
High-frequency noise from other electronic devices can sometimes block the signal. Move away from Wi-Fi routers, large metal structures, or other active RC models while binding. These sources can create enough electronic noise to interfere with the delicate handshaking process. Ensure the antenna wires are not damaged or blocked by carbon fiber frames or thick metal parts. A clear path between the transmitter and the receiver antennas helps maintain the signal strength. If you struggle, try moving to a different room or a more open space.
When to Re-bind Your Remote
You generally do not need to repeat the binding process once it is set. However, certain situations require a fresh bind. If you replace the receiver or update the transmitter firmware, the old code might no longer be valid. Also, if the model stops responding despite having charged batteries, a lost link might be the cause. Re-binding can often restore the connection if the memory inside the receiver was corrupted by a power surge or a hard crash. Treat re-binding as a standard maintenance step in these cases.
Frequently Asked Questions
Do I need to re-bind every time I fly?
No, you do not need to re-bind your system after the initial setup. The receiver stores the unique code in its internal memory, so it remembers your transmitter even after you turn the power off. You only need to bind again if you change components or experience a loss of connection.
Can I bind multiple receivers to one transmitter?
Yes, most modern transmitters allow you to store multiple model profiles. You can bind a different receiver to each profile, which lets you control several models with a single transmitter. Just ensure you select the correct model profile on your remote before you start operating a specific vehicle.
Why is my receiver light flashing red?
A flashing light usually means the receiver is in bind mode or has lost the signal from the transmitter. If it flashes after the system is powered on, check that your transmitter is turned on and set to the correct model memory. A solid light is the standard indicator that the system is linked and ready for use.
Does the distance between the units matter during binding?
Yes, keeping the devices within a few feet of each other is recommended for the best results. Being too close can cause signal saturation, while being too far makes it difficult for the receiver to catch the initial handshake. Follow the manufacturer’s distance recommendation if one is provided in the manual.
What should I do if the binding process fails?
First, verify that your batteries are fully charged and the wiring is secure. Try moving to a different location to avoid potential electronic interference from household appliances. If it still fails, consult the user manual to confirm you are using the correct button sequence for your specific hardware.
Conclusion
Binding an RC transmitter to a receiver is a straightforward process once you know the steps. By preparing your equipment, following the correct sequence, and checking for a solid status light, you ensure a reliable link for your model. Remember to keep your batteries charged and store your transmitter settings properly. This digital handshake keeps your model safe and responsive during operation. As you gain more experience, this task will become second nature, allowing you to focus on enjoying your hobby. Always refer to your product manuals for specific details, as they remain the most accurate source for your unique equipment.

Peterson is an RC hobby enthusiast and product reviewer with a passion for remote-controlled cars, trucks, boats, drones, and accessories. He enjoys testing the latest RC products, comparing features, and sharing practical buying guides to help beginners and experienced hobbyists make informed decisions. Through RCThing.com, Peterson provides honest reviews, maintenance tips, and expert advice to help readers get the most from their RC adventures.