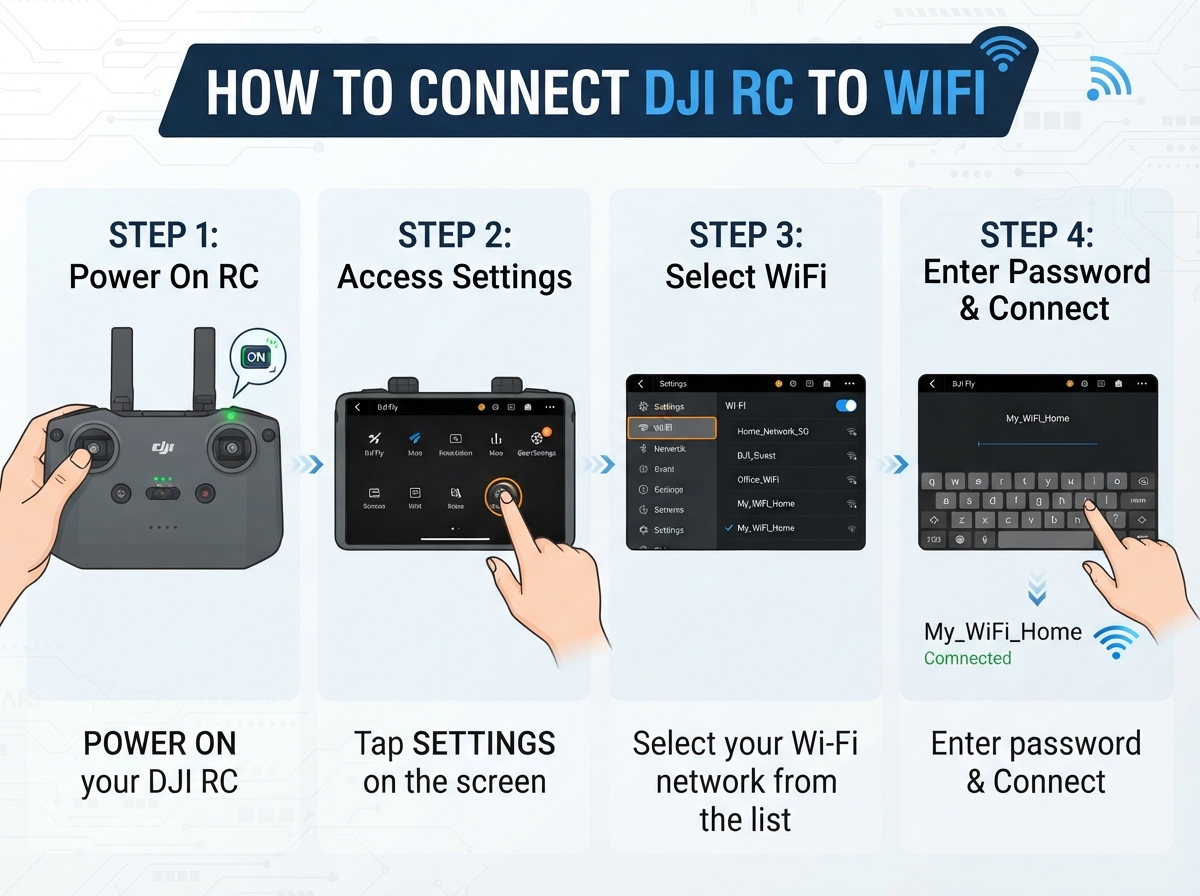
How to Connect DJI RC to WiFi?
If you just got your hands on a DJI RC remote controller, you’re probably excited to start flying. But before you can fully enjoy all the amazing features your drone has to offer, you need to connect your DJI RC controller to WiFi. Don’t worry—this task is way easier than it sounds, and we’ll walk you through every single step.
Why Your DJI Remote Controller Needs WiFi
Your DJI RC is basically a portable computer that talks to your drone. When you connect it to WiFi, you unlock access to software updates, live camera feeds, real-time flight data, and even the ability to download maps for better navigation. Think of WiFi as the gateway to using your drone at its full potential.
Without a WiFi connection, you can still fly your drone, but you’ll miss out on critical features. You won’t get the latest safety improvements from DJI, and your controller won’t communicate as smoothly with your aircraft. In short, WiFi connection makes everything better.
What You’ll Need Before Starting
Let’s gather the essentials first. You need your DJI RC remote controller, obviously. You also need access to a WiFi network—any standard WiFi router will work fine. Your network doesn’t have to be super fast, but stable is important. Grab your smartphone too, because you’ll be using the DJI Fly app to complete the setup process. Make sure your phone has the latest version of the DJI Fly app installed before you start.
Your DJI controller should be fully charged or at least have enough battery to complete the setup. This usually takes just 10-15 minutes, so even half battery is plenty. Keep your phone close by throughout the process since you’ll need to switch between your controller and app several times.
Step One: Power On Your DJI RC Controller
The first thing to do is turn on your remote controller. Look for the power button—it’s usually located on the front or side of the device. Press and hold it for about three seconds until you see lights come on. You’ll see LED indicators light up, which tells you the controller is waking up. This typically takes 5-10 seconds.
Wait a bit longer for the device to fully boot. You’ll know it’s ready when all the lights stop blinking and stay steady. This means your remote controller is now fully powered and ready to connect.
Step Two: Download and Install the DJI Fly App
If you haven’t already done so, open your phone’s app store and search for “DJI Fly.” The official app comes from DJI, so look for their logo to make sure you’re downloading the real deal. Tap the download button and wait for the app to install completely.
Once installation finishes, open the DJI Fly app. You’ll need to either log in to an existing DJI account or create a new one. Having an account is important because it links all your drone data, settings, and flight history to one place. You can use your email, phone number, or even link it to other social accounts.
Step Three: Enable WiFi on Your Smartphone
Before your phone can connect to the DJI RC, you need to turn on WiFi. Pull down the notification bar on your phone and tap the WiFi icon to enable it. Your phone will then scan for available networks. You should see a list of all nearby WiFi networks pop up.
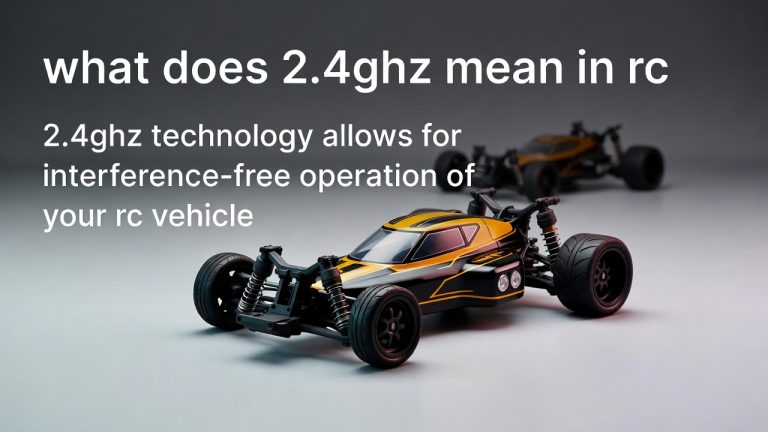
Make sure you’re looking for your home WiFi network name or the network you want to use. It’s best to connect to a 2.4GHz network if you have the option, as DJI controllers work better with 2.4GHz than with 5GHz in most cases. Look for your network’s name in the list and tap on it.
Step Four: Connect to Your Home WiFi Network
Once you tap on your WiFi network name, your phone will ask you to enter the password. Type in your network password carefully—spaces and capital letters matter here. After you enter the password, tap “Connect” and wait for your phone to join the network. You’ll see a checkmark or “Connected” message next to the network name when it works.
Your phone is now connected to WiFi. This connection allows your phone and DJI controller to talk to each other over the same network, which is exactly what we want.
Step Five: Access DJI RC Settings Through Your Phone
Open the DJI Fly app on your phone again. Look for a menu icon—usually three lines stacked on top of each other—in the app. Tap it to open the main menu. From here, you need to find “Remote Controller” or “Controller Settings.” Different app versions might have slightly different menu layouts, but it should be easy to find.
Once you tap on Remote Controller Settings, you should see various options related to your DJI RC. Look for an option that says “WiFi Settings,” “Network Settings,” or “Connectivity Settings.” Tap on this option to open the WiFi connection screen.
Step Six: Put Your DJI RC Controller into WiFi Pairing Mode
On your actual DJI RC remote controller, there’s usually a button or switch that activates WiFi pairing mode. Check the back or side of your controller for a small WiFi button. Press and hold this button for about three seconds until you see a WiFi icon appear on the controller’s screen or lights change color.
Some DJI RC models have a dedicated WiFi pairing button, while others access this through a menu on the controller’s screen. If you can’t find a WiFi button, look at the controller’s small display screen. Navigate through the menu until you find a WiFi or Network option, then tap it to activate pairing mode.
Your controller is now in WiFi pairing mode and ready to connect. You should see the WiFi icon blinking or pulsing on the controller to indicate it’s actively searching for a connection.
Step Seven: Connect the Remote Controller to Your WiFi Network
Back on your phone, in the DJI Fly app, you should now see your DJI RC appearing in a list of available devices. Tap on your controller’s name or model number to select it. The app will then ask you to select a WiFi network.
Your home WiFi network should appear in the list. Tap on it and enter your WiFi password again. The app will send this information to your controller so it can connect directly to your network from this point forward.
Your phone now acts as a messenger, delivering your WiFi information to the controller. Once the transfer completes, your DJI RC will automatically attempt to join your home WiFi network.
Step Eight: Wait for the Connection to Establish
This step requires patience. After you submit your WiFi credentials, your DJI controller will try to connect to your home network. This process usually takes 30 seconds to a couple of minutes. Don’t close the app or restart the controller during this time—let it do its thing.
Keep your phone near the controller so they can communicate properly. You’ll see a status message in the app telling you whether the connection is in progress, successful, or failed. A successful connection will show a message like “Connected” or display a green checkmark.
Step Nine: Confirm Your WiFi Connection
Once the connection succeeds, your DJI RC should display a WiFi icon with full signal bars. The lights on your controller might change to indicate it’s connected. Your phone’s DJI Fly app should also show that your remote controller is now online and connected to WiFi.
To double-check everything is working, you can check your router’s connected devices list. Log into your router settings and look for your DJI RC in the device list. This confirms that your remote controller is actually communicating with your home network.
Step Ten: Update Your Controller Software
Now that your DJI RC has WiFi access, one of the first things you should do is check for software updates. Go back to the Remote Controller Settings in the DJI Fly app and look for a “Firmware Update” or “Software Update” option.
The app will scan and tell you if any updates are available for your controller. If an update is ready, don’t skip it. These updates contain important improvements, bug fixes, and sometimes new features. Make sure your controller stays plugged in during the update process, as interrupting an update can cause problems.
Let the update run completely without touching anything. This might take 5-15 minutes depending on the update size and your internet speed.
Troubleshooting WiFi Connection Problems
Sometimes things don’t go smoothly on the first try. If your DJI RC won’t connect to WiFi, here are some fixes to try.
Restart Everything: The classic tech solution works surprisingly well. Turn off your phone, turn off your remote controller, wait 10 seconds, then turn them back on. Try connecting again.
Check Your WiFi Password: Make sure you typed your WiFi password correctly. This is the most common reason for connection failures. Passwords are case-sensitive, so check for capital letters.
Move Closer to Your Router: If your WiFi signal is weak, your DJI RC might struggle to connect. Walk closer to your router and try again. You need a decent signal strength for reliable connection.
Forget the Network and Reconnect: Some devices need a fresh start. In your phone’s WiFi settings, tap and hold your network name and select “Forget.” Then connect again and re-enter your password.
Check Your Router Settings: Some routers have security settings that block new devices. You might need to log into your router and enable MAC address filtering or adjust other security settings. Check your router’s instruction manual if needed.
Use 2.4GHz Network: If you have a dual-band router with both 2.4GHz and 5GHz networks, try the 2.4GHz one specifically. DJI controllers generally work better on 2.4GHz.
Restart Your Router: Unplug your router from power for 30 seconds, then plug it back in. Wait for it to fully restart before trying to connect your controller again.
Best Practices for Keeping Your Connection Strong
Once you get your DJI RC connected to WiFi, keep it running smoothly by following these simple tips.
Always keep your controller positioned where it has a clear line to your WiFi router. Walls and metal objects weaken WiFi signals, so avoid putting your controller in a bag or case right next to a metal frame.
Check for software updates regularly. Open your DJI Fly app at least once a week and look for any pending updates for your controller. Staying current with updates keeps your system running smoothly and securely.
Keep your WiFi password safe and don’t share it with people you don’t trust. Your drone connection is only as secure as your network, so maintain good WiFi hygiene.
Don’t leave your DJI RC sitting in direct sunlight while it’s powered on and connected. Heat can affect the electronics inside, and prolonged WiFi connection draws a bit of battery power even when you’re not flying.
Common Mistakes People Make
Many beginners make the same mistakes when connecting their DJI remote controller to WiFi.
Using the Wrong App: Make sure you’re using the official DJI Fly app and not a knockoff app. Third-party apps might look similar but won’t work properly.
Not Checking Battery Level: Connecting to WiFi uses battery power. If your controller’s battery is too low, it might power off mid-connection. Keep it charged.
Trying to Connect Multiple Devices at Once: Don’t try to add your DJI RC to WiFi while also trying to pair it with your drone. Do one thing at a time.
Ignoring Error Messages: If you see an error message, read it carefully. It usually tells you exactly what went wrong and how to fix it.
Skipping Firmware Updates: Don’t ignore update notifications. These updates fix bugs and improve performance. They’re important for your drone’s safety and reliability.
Connecting to Public WiFi: For initial setup, always use your own secure home network. Public WiFi networks aren’t reliable enough for establishing proper connections with your DJI controller.
When You Should Reconnect Your Controller
Your DJI RC will remember your WiFi network once you connect it successfully. It will automatically reconnect whenever it’s in range. However, you might need to manually reconnect in certain situations.
If you change your WiFi password, your controller won’t be able to connect automatically anymore. You’ll need to go through the pairing process again with the new password. Travel to a new location with different WiFi? Your controller will try to connect to WiFi networks it knows. If it doesn’t find any, it will stay disconnected until you connect to a new network.
If your controller acts sluggish or seems to lose connection frequently, try disconnecting and reconnecting to WiFi. This often solves performance issues and restores smooth operation.
Important Security Reminders
WiFi connectivity is convenient, but it also opens a door to potential security issues. Here’s how to keep your system safe.
Never connect your DJI RC to unsecured or open WiFi networks. Always use password-protected networks that you trust. Your drone and controller contain personal flight data that you want to keep private.
Change your DJI account password regularly. Use a strong password with capital letters, numbers, and special characters. Don’t use the same password as your WiFi network password.
Only download the DJI Fly app from official app stores. Never download it from sketchy third-party websites. Fake apps can compromise your data and your drone’s security.
Keep your router’s firmware updated too. Router manufacturers release security updates regularly, so check for updates to your router just like you do for your controller.
Final Thoughts
Connecting your DJI RC to WiFi is a straightforward process once you know the steps. It takes just 10-15 minutes, and you’ll unlock all the amazing features your drone system has to offer. Your remote controller becomes smarter and more capable with WiFi access, giving you a better flying experience overall.
Take your time with the setup, don’t rush through the steps, and you’ll have everything working perfectly. If you run into trouble, remember that the DJI community is huge and helpful. Search online or reach out to DJI support if you get stuck on anything.
Now that you know how to connect your DJI RC to WiFi, you’re ready to enjoy your drone to the fullest. Get out there and fly safely!