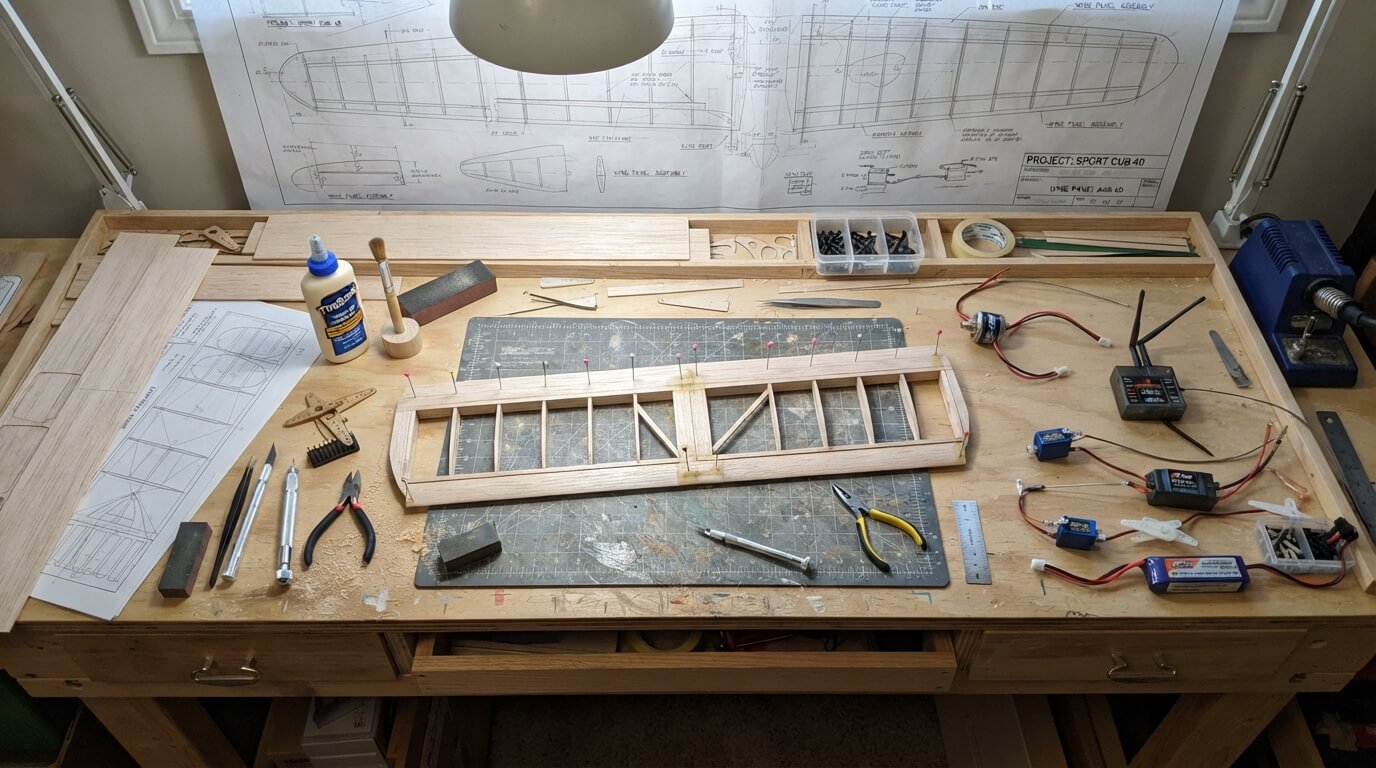
How to Build an RC Airplane?
Building your own remote-controlled airplane is one of the most rewarding hobbies you can pick up. There’s something magical about watching a plane you assembled with your own hands soar through the sky. Don’t worry if you’ve never built anything before – we’ll walk through every step together, and by the end, you’ll have the knowledge and confidence to construct your very own flying machine.
Why Build Your Own RC Aircraft?
You might wonder why you should build a radio-controlled plane from scratch when you can just buy one ready to fly. Here’s the thing: building one yourself teaches you how everything works. You’ll understand each component, how they fit together, and why they matter. When something goes wrong (and it might), you’ll know exactly how to fix it.
Plus, you save money. A custom-built model costs way less than pre-built models of the same quality. You also get the satisfaction of flying something you made yourself. That’s worth a lot.
What Tools You’ll Need
Before you start assembling your remote control airplane, gather your tools. You don’t need fancy equipment – most of this stuff you probably already have.
A hobby knife or X-Acto knife works great for cutting foam and wood. You’ll also want sandpaper in different grits (we recommend starting with 80-grit, then moving to 220-grit for smooth finishes). A ruler or measuring tape keeps your dimensions accurate. A pencil marks where you need to cut.
Hot glue guns are your best friend for attaching foam parts. Get a good one with temperature control. You’ll also need epoxy glue for stronger bonds on wooden pieces. A mixing cup and disposable brush help apply epoxy without mess.
Stock a heat shrink tool for covering your aircraft frame. A soldering iron lets you melt foam cleanly. A small dremel or rotary tool makes drilling and shaping easier. Don’t forget safety glasses – protecting your eyes matters.
Understanding the Main Components
Every remote-controlled flying model has several key parts that work together. Let’s break them down so you know exactly what each piece does.
The Fuselage This is the main body of your airplane. Think of it as the skeleton. The fuselage holds everything together and protects the internal components. Most modern RC planes use foam construction because it’s light and durable. Balsa wood is another popular choice – it’s even lighter but more fragile.
Wings Wings lift your aircraft into the air. The shape and size of wings determine how well your plane flies. Larger wings provide more lift but move slower. Smaller wings require more speed but let your airplane maneuver quickly. You’ll attach wings to the fuselage with bolts or pins.
Control Surfaces Control surfaces let you fly your plane. The elevator on the tail controls up and down movement. The rudder steers left and right. Ailerons on the wings control rolling movements. You’ll connect all these to servos, which are tiny motors that move when your remote sends signals.
The Motor and Propeller The electric motor spins the propeller to push your airplane forward. Most modern RC planes use brushless motors because they’re efficient and powerful. Propellers come in different sizes – larger propellers provide more thrust but need stronger motors.
Battery and Power System A lithium polymer (LiPo) battery powers everything. These batteries are light and pack lots of energy. You’ll charge them before each flying session. An electronic speed controller (ESC) regulates power flow to the motor based on your remote input.
Radio System Your transmitter (the remote in your hands) sends signals to a receiver in the plane. The receiver talks to the ESC and servos to control your aircraft. Budget receivers work fine for beginners – you don’t need expensive gear to start.
Choosing the Right Airplane Design
Your first step is picking what kind of airplane you want to build. Different designs fly differently, so let’s explore your options.
High-Wing Trainers These planes have wings on top, which makes them stable and forgiving. They’re perfect for beginners because they fly slowly and smoothly. If you mess up a turn, the plane usually corrects itself. Trainers are basically impossible to crash in a bad way – they just wobble and recover.
Low-Wing Aerobatic Aircraft These speedy birds have wings on the bottom. They’re fast, agile, and need skilled hands. Don’t start here. These planes demand quick reactions and precise movements. Save aerobatic models for when you’ve got some flight time under your belt.
Flying Wings These planes have no tail – just wings. They look futuristic and fly incredibly well. Flying wings are stable and efficient. They’re great for beginners who want something a bit different. The unusual shape feels weird at first, but they respond beautifully.
Gliders Motor-free gliders launch with a hand toss or tow behind a powered plane. They stay airborne by catching thermal updrafts and ridge lift. Gliders teach you about flight dynamics without engine noise. They’re peaceful to fly and incredibly fun.
Start with a high-wing trainer. Seriously. Trainers teach you the fundamentals without fighting you. Once you master a trainer, moving to other designs becomes natural.
Building the Fuselage
Now we get to the actual building part. Let’s construct the main body of your remote control plane.
First, gather your foam or balsa sheets. Foam is more forgiving for beginners – it’s harder to mess up when you cut it. Measure your design carefully and mark all the cut lines with a pencil. Take your time here. Accurate measurements mean a plane that flies straight.
Cut along your lines slowly using your hobby knife or hot wire cutter. Apply gentle pressure – don’t try to cut through on the first pass. Multiple light passes work better than one hard cut. Heat up your soldering iron if you’re using foam; it melts foam cleanly without creating flakes.
For the internal structure, build a wooden frame using balsa strips. This frame gives your fuselage shape and strength. Glue frame pieces together using epoxy. Let each joint cure fully before adding the next piece. Rushing this step causes structural problems later.
Once your frame is ready, attach foam layers around it. Use hot glue for foam – it sets fast and holds well. Build your fuselage symmetrically. Check that both sides match. Any imbalance creates a plane that pulls to one side constantly.
Sand your finished fuselage smooth. Start with 80-grit sandpaper to shape everything, then finish with 220-grit to smooth the surface. A smooth surface flies faster and looks better. Take breaks while sanding – it’s tedious but worth it.
Assembling the Wings
Wings are where the real work happens. Build them carefully because wing mistakes cause flying problems.
Start by constructing wing ribs – these are the vertical pieces that give your wing its shape. Most RC planes use dozens of ribs spaced evenly along each wing. Cut them from balsa wood and stack them onto a wooden spar (the main support beam running through the wing).
Glue ribs to the spar using epoxy. Space them exactly as your plans show. Uneven rib spacing causes twisted wings, which make your plane impossible to fly level. A simple spacer jig helps keep ribs evenly spaced.
Once your wing structure is done, cover it with fabric or film. Monokote (a heat-shrink plastic film) is popular because it’s lightweight and looks professional. Lay it over your wing structure and iron it on. The heat melts it slightly so it shrinks tight. A wrinkle-free finish looks great and flies well.
Build control surface hinges from tough plastic or Mylar tape. Apply hinge tape along the whole length where your aileron meets the wing. This lets the aileron flex up and down. Test the hinge – it should feel smooth with no stiffness.
Build your second wing the same way as the first. Don’t shortcut this. Identical wings fly true. Different wings make your plane spiral or spin.
Installing Control Surfaces and Servos
Your control surfaces need to move, and servos make that happen. Servos are mechanical devices with shafts that spin to adjust their position. Pushing a button on your transmitter tells a servo where to go.
Mount your servos inside the fuselage near where the control surfaces are. Use servo brackets screwed to the wooden frame. Keep servo wires organized and away from the motor. Tight, messy wiring causes problems.
Connect pushrods from servos to control surfaces using clevis pins or ball links. These connectors allow movement while staying secure. Set the neutral position first – this is where your control surface should be when you’re holding the transmitter centered. Adjust clevis pins until neutral positions are perfect.
Test every control surface. Push your transmitter stick – your aileron should move. Move the pitch stick – your elevator should flex. Test the rudder. Each surface should move smoothly without grinding or sticking. If something feels rough, find and fix the problem before flying.
Preparing the Motor and Propeller System
Your motor is the heart of your airplane. It needs power, cooling, and proper positioning.
Mount your electric motor at the very front of your fuselage. Use a motor mount that secures it firmly. Vibration from an unbalanced motor damages everything around it, so secure mounting matters. Make sure the motor shaft is perfectly straight and level.
Attach your propeller to the motor shaft. Balance your propeller first by hanging it on a string – it should not tip one direction or the other. An unbalanced prop causes terrible vibration. If your prop is unbalanced, add small weights to the lighter blade.
Install a spinner (the nose cone that covers the motor) in front of the propeller. This improves air flow and looks professional. The spinner protects your prop from damage too.
Set your ESC (electronic speed controller) in the fuselage away from the battery. The ESC gets warm during flight, so position it where air can flow around it. Mount it securely so vibration doesn’t shake it loose.
Battery and Electrical Integration
Your battery powers everything, so treat it carefully. LiPo batteries are fantastic but need respect – they’re dangerous if handled wrong.
Mount your battery in the fuselage where you planned. Balance is crucial here. Your plane’s center of gravity (CG) needs to be in exactly the right spot, or it won’t fly. Too much weight forward and your plane dives. Too much weight back and it climbs steeply and stalls. Your plans tell you exactly where CG should be. Trust the plans.
Run the battery connector (usually a XT60 or XT90) out to your ESC. Solder or crimp the connections firmly. Loose electrical connections cause flights to end badly.
Connect the ESC to your motor. Again, solder or crimp – no loose connections. Your receiver needs power too, which usually comes from a small linear regulator powered by the ESC. This regulator steps down the main battery voltage to the lower voltage your receiver and servos need.
Connect your receiver antenna wire along a side of your fuselage. The antenna can’t be coiled or bent tightly – it blocks radio signals. Run it straight and keep it accessible.
Covering and Finishing Your RC Airplane
Your aircraft frame is done, but it needs covering. Covering serves two purposes: it looks finished, and it stiffens the structure.
Monokote film is the popular choice for covering. Lay it over your frame and use heat to shrink it tight. Start at one end and work toward the other. Use a hobby iron or heat gun on low heat. High heat melts foam, so go slow.
Work out air bubbles and wrinkles as you go. A slight wrinkle now becomes huge once the film cools. If you make a bad mistake, you can peel off the film and try again (though this is annoying).
Apply multiple colors if you want. Most people use a bright color like yellow or orange as the base, then add stripes or designs in darker colors. Bright colors help you spot your plane in the sky.
For a cleaner look, you can cover with tissue paper and dope (a shrinking fabric coating). This takes longer but looks traditional and flies well. Tissue is lighter than Monokote, which can help if your plane is heavy.
Balancing Your Aircraft
Before you fly, balance your plane. This is absolutely critical. An unbalanced plane will crash even if everything else is perfect.
Find the balance point on your wings by hanging the plane under a string. The balance point should match what your plans say. If it doesn’t, you need to move weight.
Move the battery forward or backward to adjust balance. Small adjustments make huge differences. Get the CG (center of gravity) spot-on. Your plane will fly smoothly and respond to your controls correctly.
Setting Up Your Radio System
Your transmitter and receiver need to be programmed together. This is called “binding” them. Your radio system manual shows you exactly how.
Bind your receiver to your transmitter before your first flight. Without binding, your receiver won’t listen to your transmitter. Most systems require you to power up the receiver, then hold a button on the transmitter. After a few seconds, they connect.
Program your transmitter for the correct plane type – trainers, normal, or acrobatic. Set up your switches for things like landing gear (if you have it) or flaps. Adjust the sensitivity of each control – most trainers need more servo throw (bigger movements) to handle wind.
Perform a radio range check before flying. Hold your transmitter away from the plane (turned off) and move far away. Your receiver should still respond to transmitter inputs at 100 feet away. If it doesn’t, check your antenna connection.
Pre-Flight Inspection
You’ve built an airplane. Now comes the scary part – your first flight. Before you launch, check everything.
Walk through every control surface. Move each one and make sure the servo moves it properly. Test the motor by powering it on briefly (hold it firmly!). The prop should spin smoothly without grinding.
Check that your propeller is secure. Spin it by hand – it should not move on the shaft. A loose prop flies off mid-air and becomes a dangerous projectile.
Confirm your antenna is secure and straight. Damaged antennas cause loss of control.
Look at your battery connector. Is it tight? Wiggle it slightly. It should not move. Loose connections cause power loss during flight.
Check that nothing is loose inside the fuselage. Shake your plane gently. Nothing should rattle. Loose internal parts shift during flight and cause crashes.
Inspect your covering for tears or damage. Small tears can grow during flight.
Choosing Your Flying Location
Your first flight shouldn’t happen in a crowded park. Pick an open field with no obstacles. A big sports field works great. You need plenty of space to make beginner mistakes.
Fly on calm days for your first few flights. Wind makes everything harder. Once you get good, wind becomes fun, but don’t start in wind.
Make sure your flying spot allows RC aircraft. Some areas have restrictions or require permission. Check local rules before flying.
Tell someone where you’re going. Keep your phone charged. Bring water and sunscreen.
Your First Flight
This is the moment. Your plane is ready. Here’s how to launch.
Hold your airplane level and aimed into the wind. Point the nose slightly down. Turn on the transmitter, then turn on the receiver. Wait five seconds for everything to wake up.
Ask a friend to film your flight if possible. It’s cool to watch later, and video helps you figure out what happened if something goes wrong.
Gently push the throttle stick forward. Your plane should roll forward. As speed builds, the wings generate lift. Don’t rush the takeoff. Let it fly off naturally as it gains speed.
Once airborne, ease back on the throttle slightly. You don’t need full power to fly level. Let your plane climb gradually. Resist the urge to turn immediately. Fly straight ahead for a bit while you get a feel for the controls.
Try a gentle turn. Small movements on the aileron stick. Your plane should bank smoothly. Don’t turn too steeply – keep turns gradual while you’re learning.
When you’re ready to land, reduce throttle and aim for your chosen landing spot. Your plane will glide down. Flare (pull back gently on the elevator) just before touchdown to reduce landing impact. The plane should touch down with its wheels (or belly) first, then slow down.
Congratulations! You flew your own airplane.
Troubleshooting Common Problems
Your first flight might not be perfect. Here are common issues and fixes.
Plane pulls to one side – Your CG might be off, or wings could be uneven. Land immediately and check both.
Elevator feels backwards – Your servo might be reversed. Fix this in your transmitter settings.
Plane climbs too steeply – You have too much up-elevator throw set. Reduce it in your transmitter.
Won’t climb at all – Reduce CG forward slightly or increase throttle.
Landing gear breaks – Landing gear is fragile. This happens. Build stronger gear or use a wider landing stance.
Prop breaks mid-flight – Props break eventually. Carry spares. Keep spare motor shafts too.
Improving Your Flying Skills
Your first successful flight is just the beginning. Keep practicing.
Make gentle turns and figure eights. Practice going up and down with your throttle. Try landing repeatedly – smooth landings take practice.
After several flights, try a gentle loop. This teaches you to trust your plane’s ability to stay airborne.
Eventually, try inverted flight – upside down flying. This feels impossible until you actually do it.
The more you fly, the better you get. Each flight teaches you something new about how your plane handles.
Maintenance and Repairs
Your airplane needs care after flights.
Check the covering for damage after each flight. Repair small tears with tape. Bigger tears need covering material.
Inspect servos for sand or debris. Clean them gently with a soft brush.
Check motor brushes (if you use brushed motors). Carbon dust builds up. Clean the commutator gently with a dry brush.
Balance your propeller again if you notice vibration.
Check battery for swelling (a sign of damage). Never fly with a swollen battery.
Tighten bolts that may have loosened. Vibration loves to shake things loose.
Building Your Second Airplane
Once you’ve mastered your first plane, build another. Your second build goes way faster because you know what you’re doing.
Try a different design. Maybe a low-wing after mastering a trainer. Maybe a flying wing. Each design teaches new lessons.
The second plane usually flies better than the first because you learned from mistakes you made building the first.
Conclusion
Building an RC airplane from scratch is absolutely doable for beginners. You don’t need special skills or expensive tools. You need patience, attention to detail, and willingness to learn.
Start simple with a high-wing trainer design. Take your time building. Check every measurement. Test every connection. Balance your plane carefully.
Your first flight might be clumsy and short. That’s okay. Even a three-second flight feels like an accomplishment when you built the plane yourself.
Keep flying. Build more planes. Push your skills. Join a local flying club and meet other enthusiasts. The remote control aircraft community is friendly and helpful.
You’ve got this. Get your tools together, grab a set of plans, and start building. The sky is waiting for your airplane.